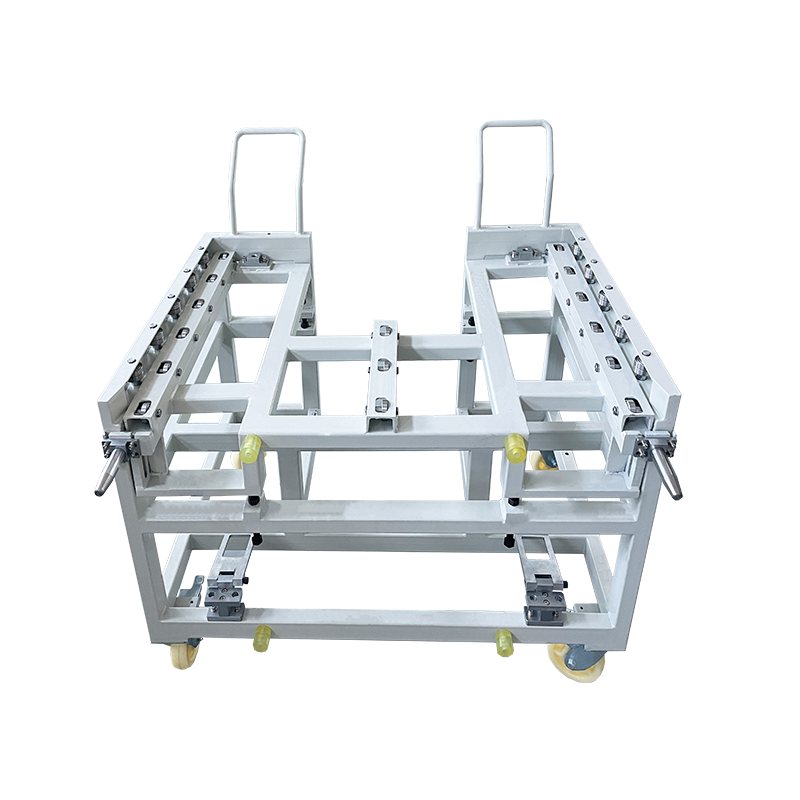
Automotive Interior and Exterior Trim Wrapping and Edging Mold Change Cart
Product Introduction
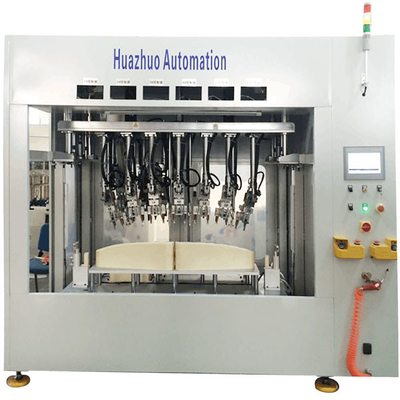
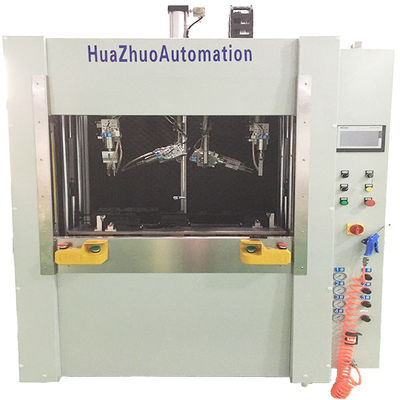
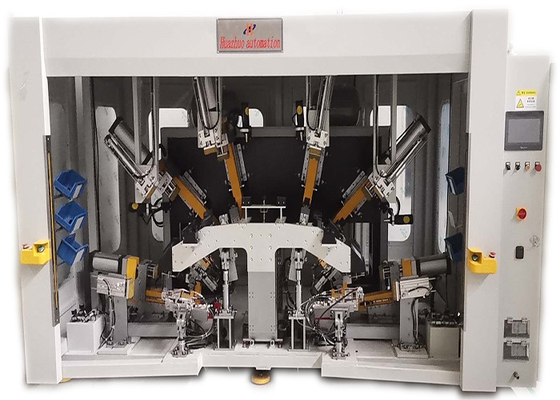
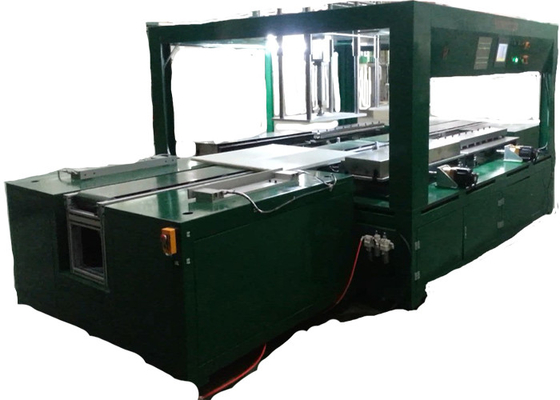
The Mold Change Cart is a manually operated auxiliary device for the automotive interior and exterior trim wrapping and edging process. It is designed to quickly change molds on wrapping equipment. By changing molds, it enables one machine to serve multiple purposes, reducing equipment costs, saving production space, and increasing production efficiency.
Features
a. Quick Mold Change: Compact design, easy to operate, and allows for quick mold changes to minimize downtime.
b. Versatility: Suitable for a variety of mold sizes, adjustable to meet different product requirements.
c. Mobility: Equipped with casters for easy manual movement and positioning within the workshop.
d. Durability: Made from high-strength materials, ensuring a robust structure and long service life.
User Guide
a. Equipment Preparation: Place the mold change cart near the wrapping equipment to ensure sufficient operating space.
b. Mold Installation: Manually install the new mold onto the cart's fixing device, ensuring it is secure.
c. Mold Securing: Use the manual fixing device on the cart to secure the mold, preventing movement during operation.
d. Mold Change: When a mold change is required on the wrapping equipment, manually push the cart to the equipment and quickly change the mold.
e. Equipment Cleaning : After use, manually clean the mold change cart to ensure cleanliness and extend its service life.
Application Scenarios
For mold changes on wrapping equipment used for automotive seats, dashboards, door trims, and other interior components.
Operating Steps
1. Equipment Inspection: Before starting, manually inspect the wrapping equipment, alignment fixture, and mold change cart to ensure they are in proper working condition.
2. Material Preparation: Prepare the required wrapping film, interior or exterior trim pieces, and other materials.
3. Equipment Adjustment: Manually adjust the wrapping equipment parameters according to product requirements, such as temperature, pressure, and speed.
4. Alignment Operation: Use the alignment fixture to align the interior or exterior trim pieces, ensuring seam alignment with the alignment plate.
5. Wrapping Operation: Place the aligned product on the wrapping equipment and proceed with the wrapping process. Ensure the film is smooth and well-adhered during wrapping.
6. Mold Change: When a mold change is required, use the mold change cart to manually and quickly change the mold, reducing downtime.
7. Quality Check: After wrapping, manually inspect the product quality to ensure there are no bubbles, wrinkles, or other defects.
8. Equipment Cleaning: After the operation is complete, manually clean the equipment to ensure it is in good condition for the next use.
Precautions
Operational Safety: Operators should wear protective gloves and safety glasses to avoid burns and mechanical injuries.
Equipment Maintenance: Regularly manually maintain and service the equipment to ensure its proper operation.
Material Selection: Choose high-quality wrapping film to ensure wrapping effects and product quality.
Summary
By utilizing the manual alignment fixture and mold change cart, the automotive interior and exterior trim wrapping and edging process becomes more efficient and precise. The mold change cart enables quick mold changes on wrapping equipment, achieving multi-purpose use from a single machine, reducing equipment costs, and saving production space. The combination of these devices provides high-quality product assurance for the automotive manufacturing industry while enhancing production efficiency and economic benefits.


 Your message must be between 20-3,000 characters!